Thursday, January 27, 2022

Micro Armor US and East Block Forces Project

I've been working on my Micro Armor, most all produced by GHQ, that I've been collecting for many years.  I think I got my first boxes of US Tank Company and Command and Soviet Tank Company and Command back in the latter part of the 1980's.  I previously painted a few things, but this was first endeavor on a large scale.  I decided to do the Soviet forces in primarily a deep green color, I can't remember exactly which colors I used for them, if I find them, I'll edit them in.  I experimented with several different colors before settling on the ones I used.  Everything was washed with Citadel Agrax Earthshade.  I do know I used a bit of an olive yellow color over the green for some older T-64's.  I'm sure the Soviets used some type of camouflage patterns back then but believe they did a lot of mono-color schemes.

As for the U.S. forces, I used Vallejo Gunship Green (895) as a base color for all armor except the M1A1 Tanks.  For the camouflage scheme (MERDC) all the rest of the US vehicles, used basic black splotching, but later found that Vallejo German Grey (995) looked and worked a lot better, as the dark splotches are truly NOT black but a dark shade of gray/black.  For the brown camouflage portion used Vallejo US Field Drab (873), in accents along the dark blotches, and then some very small very light strokes of Iraqi Sand (819).  If you look at pictures of US camouflage patterns, the green is most prevalent, followed by dark grey/black, then smaller blotches of brown, and very few sand-colored streaks. The canvas on the 2.5 Ton Cargo Trucks was Vallejo Model Air color Light Grey Green (044).  All were washed with Agrax Earthshade.

For the M1 Tanks I used a bit different shade of green with black (should have used the German Grey), and Leather Brown (818). I initially used a wash on these but it darkened/muted the color a bit too much, so I went back in and re-touched up the colors.

Tracks for vehicles could the German Grey with a little light drybrush of gunmetal.

The soviet vehicles outnumber (at this point) the US vehicles, as would be expected.  I used a good variety of Armored Personnel Carriers (APC's) on both sides for transporting troops.  Each force also has a complement of Artillery assets, anti-air assets, some engineering and equipment recovery assets, and air assets including transport and attack helicopters, and fixed wing fighter/bomber aircraft.  Eventually I will get the ground troops painted.

Doing the camouflage was cool, and I've received a lot of really positive comments on Facebook Micro Armor Wargaming group, but it was pretty time consuming and detailed.  I got into a  assembly line mode where I used a similar pattern for all vehicles of a certain type, just so I didn't have to re-imagine camo schemes.  I'm very happy with the end result of my US camo work, especially for the number of vehicles involved.

PS... Thanks Russia for potentially invading the UKRAIN and providing us more scenarios for Russian vs Russian battles...  

                                                           US FORCES


Artillery, M577's, M113 Mortar Carriers and APCs


M1s and M60s, 2.5 Ton Trucks, Wreckers


Recovery Veh and Artillery middle right, HMMWVs

Vulcan ADA Vehs, TOWs, 113's


Tow Mounted 113s


SOVIET/EAST BLOCK FORCES

Overall Force, Artillery in Back

Air Defense Systems (ZSU 23-4), SA-6 Gainful
Behind the Tanks

Tanks, Tanks, Tanks

APC's BRDMs, BTRs, BMDs, BMPs


Friday, August 20, 2021

The Union Infantry Project: or 'How I Lost My Mind Painting Over and Over and Over for 3 Months'

I've been working on 15mm American Civil War figures on and off , and a couple months ago broke open two of the old large packs (100+ figs each) of Old Glory, Union Marching and Union Skirmishing.  I popped them onto about 34 popsicle sticks, (six to seven on average per stick), primed them up (using some black but mainly a brown primer), and got to assembly line painting...  Somewhere, I could have sworn someone said painting 15mm was easier than 28mm... I hope to find that person one day and kick them right in the chach-bag... yes, there is less to paint, but it's all a lot smaller and doesn't lack for detail, ie. multiple bags, bedrolls (both grayish and light brown), belts, buckles, skin, straps (black and off-white), guns, bayonet frogs, canteens (blue and grayish), mustaches and beards, hat brims, shoes, socks, and all the other small stuff like buttons...  It's a lot but the devil is in the details sometimes.

I started out with pants... painted all 214 figures, then started over and did all jackets and hats, then start over and do all the next item, star over and do all the next item... and so on and so on and so on... In a two or three hour window I might get six sticks worth of figs done... so night after night after night this went on  for several months (the date of one pics showed June 3 this year, so it appears I started sometime in May.  I could paint faster, but I do like to try to paint to a higher standard than simple gaming table figs.  No I'm not OCD.... well maybe a little...  I read a blog at macpheesminiaturemen.blogspot.com where he has some great tips and tutorial stuff... great painter too... but he wrote in once article about maximizing your work process... that's very helpful.  Next time I think I'll just do one bag at a time though.

Well as of last night I finished up this lot, getting the majority of the figs based four to a 1" square, using 40 squares.  One night to glue figs on, one night to paint the base dark brown, and last night getting all 40 bases flocked with grass and a few rocks.  I'm really happy with the way they turned out.  

I've got about 40 loose figures left, as I ran out of 1" bases and waiting for a new order to come in... and I need to do some command stands with Officers, flag bearers, and maybe some drummers.  I intermixed the marching figs with the skirmishing figs to give a lot of variety, and tried to be careful not to make any bases look too much like any other.

I've got a number of large quantity bags of Confederate soldiers, artillery, more cavalry, and additional bags of Union infantry (Berdans Sharp Shooters and Iron Brigade), and more Artillery and cavalry.  I didn't realize the artillery was going to go quite as far as it did... I might have to sell a bag and use the money to finance some other figure purchases... OR... I could paint them up and sell the painted sets for a nice little profit... to offset costs you say?  NO!!... to buy more figures of course.  

Here are some pics of this endeavor...


Saturday, January 30, 2021

 British Colonials... Again

I did another group of nine British Colonial troops, but these are a bit different from the previous set.  These are from Reaper Chronoscope, and although they are supposed to be 28mm, they are a bit bigger.  They will work well for skirmish games.  Yellow facings this time vs. the green facings.


American Civil War (ACW): Union Artillery

Just finished up a bag of 15mm Old Glory 'Yanks Artillery' (15ACW10).  It was one of the older packs with 12 artillery pieces and 60 men.  I did my best this time to be as efficient as I could to save time, although I did find myself clinging to my usual desire to pay attention to detail vs just slapping paint on.

This was my first foray into Union troops, so there was some experimentation with colors for uniforms.  I wasn't sure whether to use Vallejo 'Dark Prussian Blue' with 'Intense Blue' highlights for frock coats, and finally settled on 'Oxford Blue' which had a bit of a purplish hue.  I think for my next project of regular infantry I may go back and try the 'Dark Prussian Blue' route or Delta's Ceramcoat 'Navy Blue'.  Shades of uniforms varied with dye lots and age of the garments from fading, so it's not too big a deal either way.  Best to have some variety on the tabletop.

I used 'Deep Sky Blue' mixed with a bit of 'Sky Grey' for the pants.  'Sky Blue' and even 'Deep Sky Blue' seem just a touch bright, but the addition of a touch of 'Sky Grey' seemed to dull them a bit.  Again, I read another's blog in which he had used Delta Ceramcoat 'Denim Blue', so I picked that up from Michaels Craft Store, along with 'Blue Jay' and 'Navy Blue' and plan to experiment with those.

All came out pretty well and am really happy with the figs, despite a near disaster using Krylon dull-cote spray which left the dreaded (mild) white haze on my entire project.  I read in another blog someone had put olive oil on the same thing and solved the problem, which I tired, brushing a very light coat on the figs and cannon.  Three days later they were glossy with oil so had to take a soft toothbrush and soapy dishwater to them to get the oil off.  On the plus side it took not only the oil off but also the dull-cote, so I was back to the slightly glossy figs from the 1st clearcoat pass.  Back to Tester's Dull-coat.  All is good.

The basic steps I took were to mount the bare figs on tongue depressors, prime and paint.


I used Litko 1"x1.5" wood bases, except for three additional larger cannon of a different manufacture, where I had to increase to 1"x2", keeping the 1" frontage.  I painted the bases first with a quick coat of cheap brown before mounting the cannon and three to four men per cannon, and two men for the Gatling.  Oh, yeah, I had a couple Gatling guns I'd previously painted.  Since I had the two Gatling guns and three slightly larger cannon, I used some of the figs from the pack to man those bases.

Other's said they used fine brown ballast for the ground, but I didn't have that on hand and used plain sand I had gathered a few years back from the street curb, which had a bit of larger bits that seem to work well.  I used Woodland Scenics Scenic Cement (very thin watery glue) and a hobby syringe with curved tip to really cover the brown wood base with glue and then added the sand.  The curved tip on the syringe really lets you get the glue where you want it without having to use a brush.  The sand hardened up really good and pretty quick and looked pretty good too.  I'll definitely go back to that.


I then used regular (thick) Scenic Glue with a brush over the hardened sand, and sprinkled Blended Turf Earth Blend then Green Blend to get my grass.  I then sprayed a light layer of the Testers Dull-coat to take the shine off.  Very happy with all of it.  I've got three Mortar stands coming.


Wednesday, November 18, 2020

More Cowboys... and Girls

I Just finished painting and basing 27 new old west figs last night... most all from Knuckle Duster miniatures, Gunfighters Ball line.  I've enjoyed painting the old west figs, and this group is extra special as one of the factions I've done up is the James Gang with Jesse, Frank, Cole and Jim Younger, Charlie Pitts and Clell Miller.

Why is that special, it's because I live here in the Midwest in Liberty, MO where there is so much history from the old west.  I live about 10 miles south of the James Farm where Jesse and Frank James grew up and where Jesse and his family are buried (Kearney, MO), and right near where Jesse committed the first daylight bank robbery in the U.S in Liberty.  Frank James is buried in Hill Park in Independence, MO just south of about 10 miles.  We are also about 20 miles north of Lee's Summit, MO which is where Cole Younger settled after his bandit days and serving some time in prison, and became an arguably upstanding citizen and was eventually buried, along with his brother Jim.

Wyatt Earp and several of his nemesis 'Cowboys' even passed through or lived in Missouri briefly.  John Peters Ringgold (Johnny Ringo) and his family moved to Liberty in 1856 when he was about six years old, and later moved to Gallatin, MO in 1858.  He was a loosely related cousin to the Younger brothers through an aunt.  Ike Clanton was born in Callaway County, MO.

There's a great little shop named 'James Country Mercantile' (http://www.jamescountry.com) on the North West side of the Liberty square.  They produce and sell an assortment of period clothing and civil war reenactor uniforms and hats (for both sides and genders), as well as other old west goods like cups, plates, pots, etc., replica black powder guns, ammunition, and reloading supplies, research material, pen and ink quill sets, etc.

I've got four more packs of six waiting to be prepped and painted.  Hopefully one day I'll get to use them in a game.  Definitely a cool line of figs and really great detail on most.  Wish I had better light for the pics, but here are the results... Funny or sad how they look better at arms length or on the table than close up shots, lol.

The James Gang, Jesse and Frank James, Cole and Jim Younger, Clell Miller and Charlie Pitts

Pinkertons

Tom Mclaury, Ike Clanton, and Billy Clanton

California Kate, Maria Louisa La Pistola, and Belle Starr


The Duke Brothers

Sharpshooters Batt Ridgely and Long Shot

Town Doctor and Mysterious Dave

Turkey Creek Johnson and Texas Jack Vermillion

Odd Figure Bill


Thursday, May 28, 2020

British Colonials

This will be a bit quicker post as it's getting later and I want to get this on here.  SO...

At the Kansas City 'Recruits' gaming convention that is held every year in Lee's Summit, MO, they have a silent auction.  It's a great place for gamers and hobbyist to sell some of the excess stuff, projects they've given up on, or just things they are no longer using and want to make room or make a little money to put towards the next project.  Also perfect to grab some choice stuff to add to your own collection, usually at a pretty good price.

At one of the silent auctions I bought  small box full of stuff and in it was some slightly primed British Colonial soldiers for circa 1870's to 1880's.  They were wearing puttees, so figuring they are perfect for East Asia and the 2nd Anglo-Afghan war period (1878-1880)... or even for Gaslight SciFi games.

I got them primed up right and started painting.  Many would exclaim that that era should be in Khaki uniform, but as I read up on it, there were still units like the 51st Regiment of Foot and 59th (2nd Nottinghamshire) Regiment of Foot wearing scarlet frock jackets with their blue trousers and puttees.
51st Foot after the battle of Ali Masjid (Nov 21st ,1878) in red tunics and blue trousers, with puttees.

Print of the battle of Omdurman (Sep. 2, 1898)
Some units weren't quite ready to transition to the Khakis, however, which would be a lesson learned as red is whole lot more visible in the barren landscape than Khaki.  For my purposes, red really looked nice and iconic and although in putties, I can use them for some games in other areas of the world.  Anyway I'm taking artistic license.  Same with the collar and cuff colors.  I went with green, which was for Irish regiments (although they apparently did include Welsh and Scots troops)

So here are a few pics then of my newly finished troop of 25.


Drums were interesting to paint but turned out good.

Tuesday, May 19, 2020

15mm American Civil War Reb Cavalry

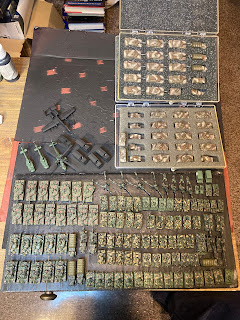
Here's something I've been wanting to get worked on for a while.  Some American Civil War (ACW) 15mm figs... specifically Confederate (Reb) Cavalry.  We've talked in our gaming group about a larger sized cavalry engagement sometime, which would be fun to do, but think all the guys are gonna have to contribute some figs to get that done if we want to have enough on the table.

I've got a whole lot of packs of Old Glory 15mm figs, so could probably paint for a couple years to get them all done... come on retirement!!  And I also don't do as much during the warm spring and summer months as I'm usually outside working around the house or enjoying some libations on the back deck while watching our dogs and the neighbors cows.

For Cav units the horses and riders come separate, so you can either mount the figs then paint or do them separate.  I like the latter and prefer to paint separate.  To do this I mounted horses to tongue depressors, four or five in a row and that worked pretty well for painting.  I just alternated some color variations of red-brown, dark brown, gray/white etc, and then added some white blaze the the chest, head, or forelegs. I thing painting the tack and harness took a bit more time.


 For the soldiers, I needed a way to pick them up and handle them, and rotate them to paint.  I got a piece of 2x6 wood, drilled out a bunch of holes to fit dowel rods into, cut the dowels to about 4 inches or so, and wallah, a nice holding block that I could pick out a figure, pick up the dowel, paint on the figure, then put it back the dowel back in the block and move to the next figure.  I did the painting all more or less assembly line doing like items as I went along, ie. all skin, all hats, all shirts, all pants, all swords etc.

The harder part was that the pack of figures I used had about half regular uniformed Cav soldiers with pistol and carbine, and the other half of riders irregulars with flop-hats, civilian jackets, pistols and shotguns.  The uniformed guys were obviously a bit easier as all the uniforms were pretty much the same.  The irregular Cav needed some imagination for color combinations to vary the jackets, pants, hats, and chaps, so not quite so quick.  Afterward I added yellow piping for the uniformed Cav's leg stripes, cuffs, collars, and hats, and even managed some arm stripes to give a bit of rank to a couple of the boys.  Gotta keep some Sergeants to keep the discipline when the butter-bar lieutenants loose it.

I finished with basing everything up, and all in all I like the way they turned out.  Whenever you do something for the first time there's that learning curve to figure out what you like and the best way to do it.  I'm looking forward to getting some line units done, but still have several packs like this of Cav units.  I might have gone a bit overboard when I first was buying them. Hmmmm... Nope... Maybe?